
The smallest component of your wheel setup can occasionally result in the largest problems worn treads or nails aren’t always the cause of tire problems. The small part that is essential to preserving appropriate air pressure is the valve stem. Your valve stem could be the cause if you have been filling up your tire more frequently than normal or if you hear a faint hiss when the tire is still.
The good news is that replacing a valve stem on your own isnt as hard as it seems. You can get your wheels road-ready again save time and avoid a trip to the mechanic by using the proper equipment and taking your time. This blog explores a step-by-step guide on how to replace a valve stem.
Understanding How to Replace a Valve Stem
You can inflate or deflate your tire using the valve stem which is the tiny rubber or metal tube that protrudes from your wheel. After inflation the air inside the tire is sealed by a spring-loaded valve core. Despite having a straightforward appearance its function is crucial to tire performance. A slow leak that lowers tire pressure could result from a damaged or deteriorated valve stem. In the end this results in hazardous driving conditions uneven tread wear and low fuel efficiency.
Common Causes of Valve Stem Failure
The lifespan of valve stems is short. These are the most frequent causes of their failure.
- Weathering and dry rot: Rubber stems can eventually become weakened and cracked by UV exposure
- Corrosion: Chemicals road salt and moisture all cause corrosion particularly on metal stems.
- Incorrect installation or overtightening: An improperly installed valve stem may fail too soon.
The valve core is subjected to additional stress due to frequent inflations and pressure checks. Examine your valve stems more frequently if your car is driven in harsh conditions or sits idle for extended periods of time.
Signs Your Valve Stem Needs Replacing
Signals that show your valve stem needs to be replaced. Keep an eye out for these warning signs:
- Regular air loss without any obvious punctures.
- Hissing noises particularly after inflation close to the stem.
- Distortion brittleness or cracks near the base of the stem.
- The wiggle test involves moving the stem gently from side to side while listening for leaks.
Before replacing the entire tire its worthwhile to inspect the valve stem if your tire deflates overnight or needs frequent air top-ups.
How to Replace a Valve Stem?
Let’s go over the entire procedure. Be sure to secure your car with wheel chocks and work on a level surface.
Step-by-Step Instructions of Replacement:
Step 1: Deflate the Tire Completely
Release all of the tire’s air using a valve core removal tool. The small component inside the stem that regulates air flow is called the valve core.
If you plan to reuse the removed core later store it in a small container to prevent loss.
Step 2: Break the Bead of the Tire
Press the tire away from the rim around the valve area with a big C-clamp or a tire bead breaker. Only enough of the tire must be removed to reach the base of the valve stem.
Take care not to harm the tire rim or wall in the process.
Step 3: Remove the Old Valve Stem
Using pliers hold the valve stem and pull it out through the rims interior. Use a utility knife or razor blade to cut it off if its deteriorated or stuck. Clear any debris or rubber fragments from the valve hole.
Step 4: Install the New Valve Stem Securely
The new valve stem should be inserted from within the rim. The stem will then pop into place after being tightly pulled through the hole with a valve stem puller tool. It should fit snugly and flush with the rim. Make sure to tighten any included nuts on metal valve stems according to the torque recommendations provided by the manufacturer.
Step 5: Re-seat the Tire Bead and Re-inflate
Start the tires inflation process with your air compressor. The tire bead will pop back into the rim as mounting pressure occurs. For a good seal you might need a brief high-volume air burst. Make sure the tire reaches the PSI that is advised for your car and inflates uniformly.
Step 6: Check for Air Leaks
Around the base of the new valve stem and tire bead mist with soapy water. Be on the lookout for bubbles which signify escaping air. If bubbles are visible tighten the core even more or re-seat the stem.
Tools Needed to Replace a Valve Stem
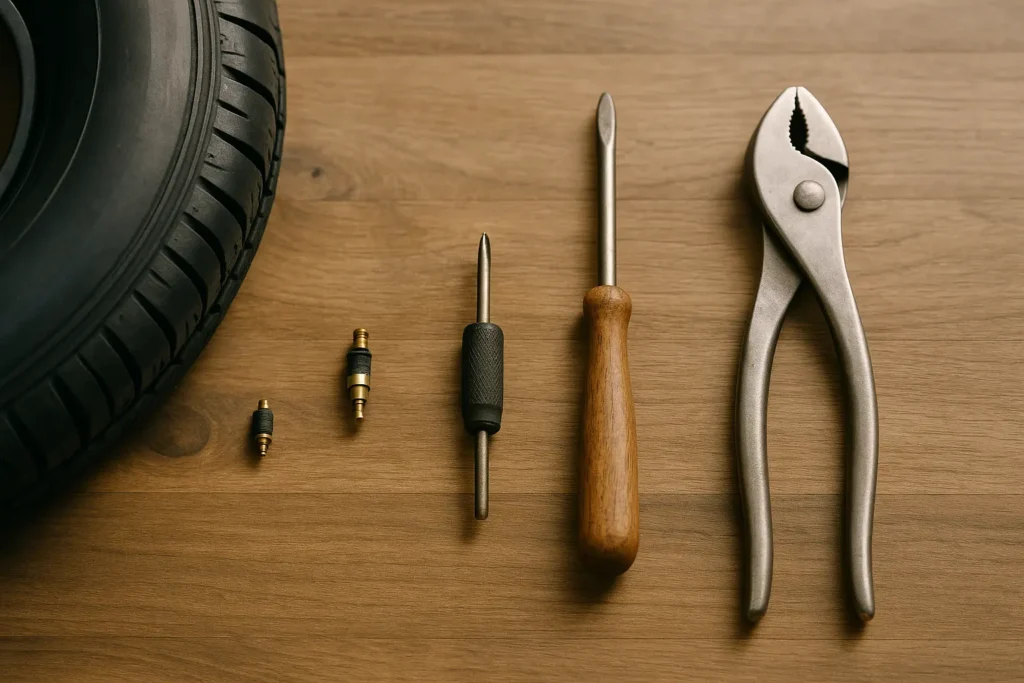
The proper equipment is necessary for a safe and clean valve stem replacement regardless of your level of experience.
Manual Tools used by individuals
Manual tools consist of a tool that is used to remove the valve core, C-clamp or bead breaker, a valve stem puller or pliers, compressor or high-volume pump for air, and to find leaks use soapy water.
Valve Stem Replacement Kits
A stem puller different stem sizes and occasionally a core tool are included in these kits. They eliminate the need for separate tool purchases and are perfect for novices. A word about quality: Spend money on a sturdy well-reviewed kit because cheap tools have the potential to break or harm your wheel rim while in use.
Safety Tips When Replacing a Valve Stem
It is generally safe to replace a valve stem, but safety should always come first. A few best practices are as follows:
When to Call a Professional
Think about getting expert assistance if the tire bead cannot be broken, and the valve stem is not seated correctly. If you are using TPMS sensors or pricey rims, and the proper tools are not with you. In addition to causing air leaks or potentially hazardous blowouts improper installation can harm your tire or rim.
What Not to Do During DIY Repairs
After installation do not neglect leak testing, old or fragile valve stems should never be used again, and don’t overtighten nuts or valve cores. For leak checks use the appropriate tire soap instead of dish soap that contains additives that break down rubber. In the long term a professional service may be less expensive than a hasty or negligent repair.
Final Thoughts
One of those neglected but necessary auto maintenance skills that anyone can learn is replacing a valve stem. With a little practice the procedure is simple whether you’re performing an emergency roadside repair or patching a tire in your garage. All 4 One Transportation Service is here to help if you need quick tire repair or roadside assistance in Allenhurst Georgia or the surrounding areas. We can save you time and hassle by providing prompt safe aid with anything from flat tires to valve stem replacements. For dependable tire repair help right where you are call All 4 One Transportation Service right now to avoid having a minor issue ruin your day.
FAQs
It isn’t safe no. The loss of air in your tire due to a damaged valve stem could result in a flat or even a blowout while you’re driving.
Although most valve stems last four to six years exposure to heat sunlight or harsh environments can shorten their lifespan.
The size and type of valve stems vary depending on your vehicle and tire so its crucial to pick the correct one.