
The roads change with the arrival of winter and your tires should too. Snow tires are an essential safety feature that improves your traction control and braking performance in cold weather they are not just a seasonal accessory. When temperatures drop knowing how to properly switch to winter tires can save you time money and stress regardless of your level of experience with do-it-yourself projects or emergency preparation.
This blog explores how to change snow tires, a step-by-step winter tire guide. Also, you will find helpful advice on how to make sure you’re ready for winter driving conditions by checking tire pressure, torque specifications and rotation patterns. The process of switching to snow tires can be simple and keep you safer on the road throughout the season if you prepare a little.
When Should You Change to Snow Tires?
Best Time of Year to Switch to Snow Tires
When is the best time of year to adopt snow tires? There’s more to timing your transition to snow tires than just the initial snowfall. Professionals advise changing when the temperature regularly falls below 45°F (7°C). Even when the roads are still clear the hardened rubber at this point causes summer and all-season tires to lose their traction. for numerous U. S. regions. S. This implies implementing the modification by the end of October or the beginning of November. It’s safer to be ready ahead of time rather than waiting for a weather advisory or icy forecast.
How Temperature Affects Tire Performance
Temperature affects the compounds in tire rubber. In cold weather summer or all-season tires become stiff which lessens their ability to adapt to uneven roads. This impacts acceleration braking and cornering. Even in extremely cold temperatures snow tires retain their elasticity and traction because they are composed of a softer more flexible compound. Snow tires are made of rubber but they also have deeper treads and special grooves that direct water slush and snow away from the tire. This improves control and lessens hydroplaning.
Signs It’s Time to Install Winter Tires
If you don’t know when to switch. Keep an eye out for following signs.
- In the mornings, you may notice frost on your windshield.
- Regularly falling below 45°F temperatures.
- Roads with ice or snow patches that are visible.
- Travel arrangements to areas with mountains or a lot of snow.
- A discernible reduction in the stopping distance or traction of your vehicle.
Being proactive prolongs tire life and helps prevent winter-weather accidents.
How to Change Snow Tires Step-by-Step Instructions?
Installing your own snow tires is not as difficult as it may seem. You can finish the task safely and with confidence if you have the appropriate equipment and are prepared.
Step 1 – Prepare Your Vehicle and Area
Our car should be parked on a level stable surface first like the garage floor or driveway. To stop the wheels from rolling put wheel chocks behind them and apply the parking brake. Get your equipment together:
- Four winter tires ideally with wheels already installed.
- Jack stands and car jacks.
- A breaker bar or lug wrench. A torque wrench.
- A work light or flashlight.
- For comfort a kneeling pad and gloves are provided.
- Prior to driving make sure your tires are in good condition and correctly inflated.
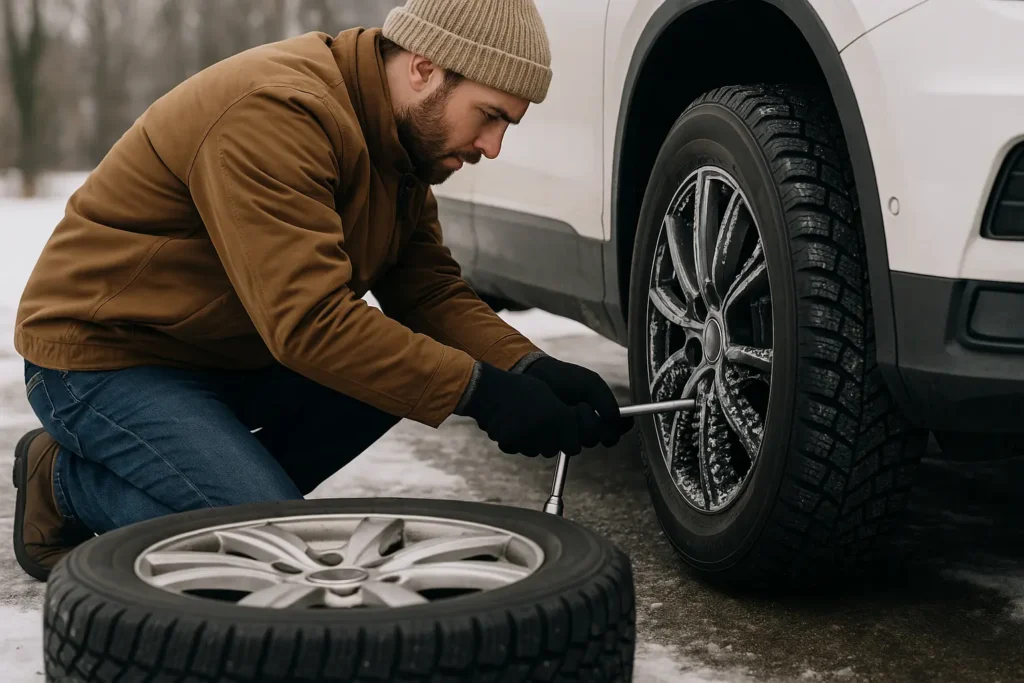
Step 2 – Loosen the Lug Nuts
Using your lug wrench loosen (but do not remove) each lug nut on the wheel you are working on before you lift the car. Keeping the tire grounded makes this step safer and simpler. Loosen in a star or crisscross pattern to prevent the wheel from warping.
Step 3 – Jack Up the Vehicle Safely
According to your owners manual place your jack beneath the specified lift point. Lift the vehicle until the tire is barely off the ground. For added safety use jack stands instead of depending just on the jack. Before continuing make sure the car is stable.
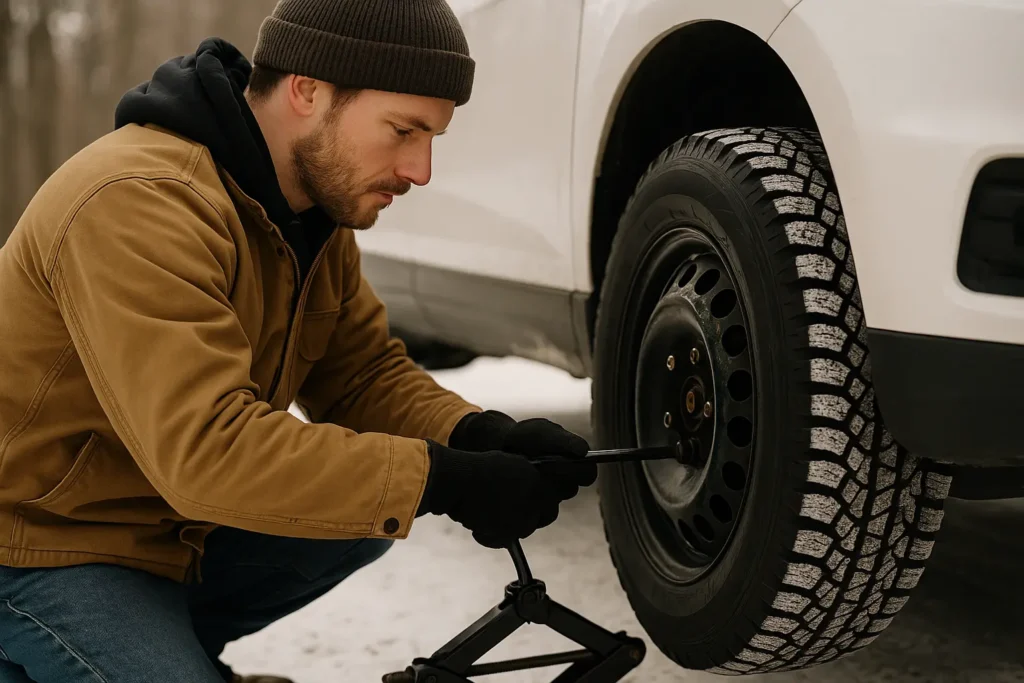
Step 4 – Remove Regular Tires and Install Snow Tires
Remove the old tire after fully removing each lug nut. Before sliding the snow tire onto the hub line up its holes with the lug bolts. To secure the wheel manually tighten the lug nuts. If the tire has directional treads be sure to mount it correctly.
Step 5 – Tighten Lug Nuts and Lower the Vehicle
Use the jack to carefully lower the car. After the tire is on the ground tighten the lug nuts in a star pattern with your lug wrench. This keeps the tire securely fastened and guarantees uniform pressure distribution. For each wheel repeat the procedure.
Step 6 – Torque Lug Nuts to Manufacturer’s Spec
Using a torque wrench tighten the lug nuts to the recommended torque specification provided by the manufacturer of your car. This specification is typically expressed in pound-feet (lb-ft). This last step is very important because it keeps the nuts from being too tight or too loose which could damage the brakes or wheels. After 50 to 100 miles of driving check the torque of the lug nuts again.
Common Mistakes to Avoid When Changing to Snow Tires
If a tire change is performed improperly it can cause issues. Here are some typical mistakes you should steer clear of:
Combining different tire brands or types. Installing four identical winter tires with the same tread pattern and brand will improve performance and safety. The following can happen when tires are mixed. Inconsistent traction
Mixing Tire Types or Brands
Combining different tire brands or types. Installing four identical winter tires with the same tread pattern and brand will improve performance and safety. The following can happen when tires are mixed.
· Inconsistent traction
- Poor braking
- Vehicle instability
- Accelerated wear
Snow tires are made to function together. Their purpose is defeated when combined with performance or all-season tires.
Ignoring Tire Pressure After Installation
Tire pressure decreases with cold air sometimes by 1 PSI for every 10°F drop in temperature. Following the installation of snow tires. Verify the tire pressure right away:
- Check tire pressure immediately.
- Inflate to the PSI recommended for the car which can be found on the owner’s manual or door sticker.
- Keep an eye on tire pressure once a week during the winter.
Underinflated tires decrease fuel efficiency increase wear and decrease traction.
Forgetting to Check Tire Rotation Pattern
Correct installation is necessary for directional or asymmetrical tires. On the sidewall of directional tires are arrows that indicate the proper rotation. Their effectiveness is diminished when mounted backward. Additionally keep in mind that the best way to balance out tread wear and prolong tire life is to rotate your tires every 5000 to 8000 miles.
Final Thoughts
Without a suitable set of snow tires winter driving preparation is incomplete. They are about more than just grip they are about safety self-assurance and tranquility when driving on icy roads and in unpredictable weather. You can lead to safer winter travel by being proactive and learning when and how to change your tires. Avoiding shortcuts that could impair your vehicles handling such as using the wrong tire type or neglecting to perform a torque check is essential whether you choose to do the tire swap yourself or get expert assistance.
Keep in mind that snow tires should be mounted on all four wheels and that their tread wear and pressure should be checked frequently. All 4 One Transportation Service is available by phone if the procedure seems too complicated or if you ever find yourself stranded. All winter long were here to help you stay safe and mobile by providing quick dependable roadside assistance in Allenhurst Georgia and the surrounding areas.
FAQs
Professionals can change all four tires in about 20 to 30 minutes while it typically takes 30 to 60 minutes to do it yourself.
Yes for safe handling and balanced traction always mount snow tires on all four wheels.
Yes technically but its not advised because snow tires degrade more quickly and don’t work well in hot weather.